
THE MODERN MINT BLOG
How To Sharpen Shears
We often get asked – how do I sharpen my shears?
Update – a video tutorial on how to sharpen your shears!
In this blog, we will give you simple to follow instructions on exactly how to do it. But first, you have to have the right shears and the right equipment….
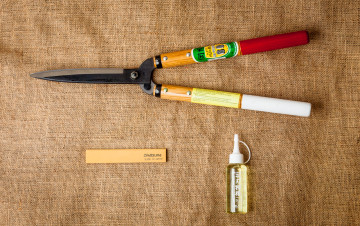
Our hedge shears of choice are these red and white handled ones from Japan.
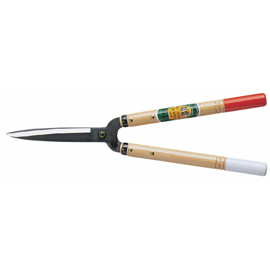
They look the bees knees. And they are.
The steel is incredible, meaning it is sharp enough to cut the vegetation you want cut down. Because the steel is so good, you can also sharpen it back to factory sharpness.
Cheap steel, once blunted, stays blunt. A waste of money.
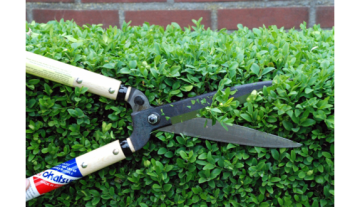
It took about ten years of gardening before I took the plunge and spent my money on these. Now, of course, I can’t go back to using anything else (and have now used them for over a decade!) Working for a landscaper back in early March of this year, I picked up another pair of shears from a colleague as they happened to be next to me at the time. I began to use them to cut down a Miscanthus and they felt awful….!
Every cut was a fight with the plant, stems got bruised instead of clipped, the tool felt like they would break and my wrists and arms had to work hard to make anything happen.
It would have taken less energy to walk back to the van and pick up my own Japanese shears (that will teach me for being lazy…)
The balance and weight of these shears is amazing – but if you’re wondering if they are too heavy, it really is useful to pop into Niwaki (who sell them) or find a keen gardener who has a pair and give them a try.
The amazing lightness and balance of these shears make them ideal for anyone – male or female, right or left-handed – and because they cut so cleanly they make lighter work of your topiary or mixed hedges.
How To Sharpen Your Shears
Finally, we get to the important bit. How to sharpen them. First of all, get a whetstone – we prefer the traditional Japanese whetstone as it doesn’t tear the steel of the blades. You can use a diamond sharpener, but it is likely to tear the steel… the better the steel, the more need for you to be so so gentle….
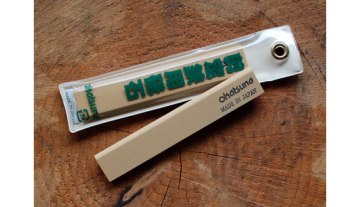
1) Make sure the whetstone is wet. At least 30 seconds in water or under a tap should soak it. One sign is the water stops bubbling!
2) Move any part of the stone gently across the edge of the blade – whether shears or secateurs. I use a small, circular motion. Others use a forward and back motion, so the stone comes towards your body and then away from your body.
3) Move along the blade. If you feel the stone drying, dip it into water or under a tap again.
4) If you do this for a couple of minutes you will see a line of fresh steel along the blade. The more you do it, the better your eye will be at discerning when the blade is sharp. It does take a little practise, and also time… but the results are always better!
5) Turn the blade over – there will be a burr on its backside. Run the whetstone along this side of the blade once or twice, from bottom to top, to remove the burr (and any sap or stone that is left on this side of the blade.)
6) A little squeeze of oil onto the blades, then wipe it clean with a cloth, will keep the steel your tools in great condition.
The oil should last a long time as you don’t need much of it. (Though I now use it on other tools as well, so do get through it a bit quicker!)
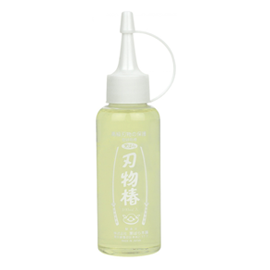
Again, the above photo is the traditional oil used in Japan, made from camellia, but any oil will do (including olive! But not WD-40!)
I just happen to like tradition so use the camellia oil.
There you go – a short tutorial on how to sharpen your shears. And there is a new video here on sharpening, as you may find it easier to watch what to do.
Any questions please do contact me, otherwise enjoy your shears and the clipping you will do!
Happy topiary-making!
Topiary, The Art Garden at The Henderson
The Art Garden at The Henderson in Hong-Kong has now opened to the public. I joined the project last March, to work with Gillespies Landscape Architects on the topiary that had been designed for the Art Garden, which gives a calm, green space below the extraordinary Henderson skyscraper designed by Zaha Hadid Architects. The garden has been designed with butterflies in mind, so lots of nectar plants, and has other art projects and installations within its footprint. The history of the site is interesting too – it was originally the first cricket ground in Hong-Kong! So still a green space….! …
ClipFest 2025
On Sunday June 22nd there will be Clipfest 2025 at Ichi-Coo Park in Surrey. It is a celebration of all things pruning and topiary, and I will be there in my capacity of teacher at the European Boxwood and Topiary Society to demonstrate tool cleaning and sharpening, and how to clip. Tickets can be found here on Eventbrite. We are hoping for great weather and to see lots of keen pruners getting their shears out and joining us at this amazing garden! And for more on topiary…
Secateur Holders
A present arrived from Norway today, from a student who visited last February to work with Chris Poole and I on learning topiary. His new hobby – a beautiful and neatly stitched secateur holder. Thrilled with this! The holder will save me keep losing my secatuers too…! Thank you Bernt! It was the same student who introduced me to the APA with whom I am doing a talk at the end of March. Tickets can be bought here for ‘Defining The Essence – Aesthetic Pruning in the Garden’. Do join the European Boxwood and Topiary Society for that!